Compressed Earth Block Shop and Home, Ruidoso Downs, New Mexico

Luther tries to chronicle the building of his compressed earth block (CEB) shop and home in Ruidoso Downs, New Mexico.

Wednesday, June 06, 2007

Finally, A Few Compressed Earth Blocks

The concrete turned gray and got hard. My father spent the better part of the last few days of his visit stripping the forms and saving all the wood so we can use it later for the bond beam at the top of the wall. When all is said and done, the grade beam looks like this:
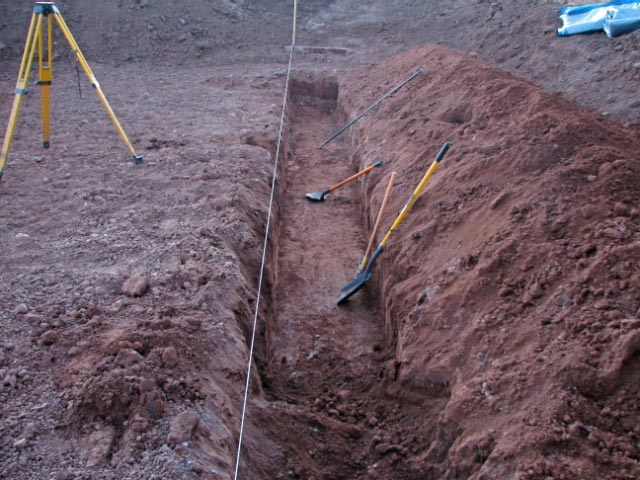
We've still been having heavy rains, so after this picture was taken, I graded around the beam, covering the exposed gravel of the rubble trench and sloping the dirt away from the foundation.

Then I went on a trip to Utah to help start a patio project for my family. As with most family projects, this one ran wild and became larger than originally expected. It is not finished, but the retaining walls are done and the base for the stone patio is set. Here is a photo:
My father will set stones for the patio surface over the course of the summer. No rest for the weary!

Upon returning to New Mexico, I found that all of the rain had spurred weed growth to the point that I spent most of my first week back mowing and pulling. With the worst of the weeds under control, I finally began setting blocks on the grade beam.

According to the State of New Mexico Earthen Building Code, any compressed earth blocks within 4" of the ground need to be stabilized. About 5 or 6 inches of the grade beam will be above grade, but just in case, I am using stabilized blocks for the first course all the way around the building. In order to stabilize the soil here on site, I add 7 or 8 percent by volume of portland cement. The portland is added dry and roto-tilled in with the soil which is then brought up to about 15% moisture content. Code then dictates that I have 1 hour to press the soil into blocks. Before heading up to Utah for the family patio project, I pressed 700 or so stabilized blocks and set them cure slowly under tarps. As with concrete, the blocks will get harder if they cure under moist conditions.

Since sometime in March, Amanda and I have been in contact with the Owlhouse Family (see their blog). They are a family of four traveling around North America, visiting and working on organic farms and other places of interest. Mostly they are finding places to stay via the Word Wide Opportunities On Organic Farms, but there were no local farms so they put out an ad on the Roswell Craigslist. We answered and were rewarded with a fun week of eating, hiking, conversation, gardening, and building. The Owlhouse Family helped out a terrific amount in the garden and also helped lay the First blocks on the foundation.

Above, Brad (the Pater Familias) looks on while I add the finish touches to the First Block. The first course of blocks are set on about 3/8" mortar made from 1 part hydrated lime, 1 part portland cement, and 6 parts sand.

Brad is tapping the last block on this corner into position. Nora is taking a break from seed planting to check out the momentous occasion.

The first corner all done. The other three corners are set up the same way and then string lines are strung between them guide the laying of the rest of the blocks. The strings ensure the walls are straight and, if the corners are set level, level. I'll try to show pictures of the strings in the next post.

Thanks to the Owlhouse Family. Come back and visit.

Saturday, May 05, 2007

Concrete is Guaranteed to do three things...

A crusty old contractor I used to work with once told me that concrete is guaranteed to do three things:
-Get hard
-Turn gray
-Crack

My dad and I finished building the forms for the grade beam that sits atop the gravel trench and also for the footing that will support the wall separating the garage from the shop.

This is the form for the footing. It is roughly 2 feet wide and 10 inches deep. Notice the re bar placed at the bottom third of the trench. This will provide tension in the lower part of the concrete to keep the wall load from cracking the footing.A detail shot of the footing where it hits the grade beam:

The next pictures are of the grade beam forms. The grade beam is 12" high and 14" wide with 2" of foam adhered to the inside edge. You can see there are two layers of re bar surrounded by a bent piece of re bar called a stirrup. All of this bar keeps the concrete stable in all directions,keeping the wall load from cracking the beam, but also keeping the beam from shifting in or out on the gravel trench. I did a back of envelope calculation one time and figured the weight of the walls, roof and snow load at roughly 75 tons, so all the re bar is a good thing. At spots in the wall where there will be floor level openings (also know as doors), we had to step the forms down. A lower band of concrete and one layer of re bar continue underneath the doors to keep the side-to-side integrity of the grade beam intact.

The forms:A detail shot of the corner:
The step down and back up for the garage door:
A step down and back up for an access door:

Once we finished straightening and levelling all of the forms, we called in the concrete. Since I did not have enough room to pour directly from the concrete truck, I rented a pump:
The truck pours the concrete into this hopper:
And the machine pumps is out this very long (and very heavy) hose that is being unreeled by the pump owner:
Using the pump, we "sprayed" the concrete into the forms, leveled and smoothed it off at the tops, and covered it with tarps and plastic. I would like to say I have pictures of this pouring process, but my camera had an operator failure (if I cannot even operate a camera, should I be allowed to build a building?), and I did not manage to take pictures during the pour.

Here is a picture of everything covered up with tarps:
Contrary to urban legend, concrete does not "dry" it "cures." The chemical reaction that makes concrete get hard and turn gray requires moisture and lasts, in this situation, about a week or so. So the tarps and plastic will stay in place for many days, allowing the grade beam and footing to become as hard and strong (and gray) as possible. Eventually, we will have to take the tarps off. At this point, the excess water in the concrete will evaporate and the third step will happen--the concrete will crack (assuming the crusty old contractor is right). Don't worry, the cracks will be small and most likely harmless...

Monday, April 23, 2007

The Bloody Trench is Finally Full of Gravel

My dad and I finally filled the trench with gravel. After installing expanded polystyrene foam around the inside edge (see picture below, the supervisor kitty or fore cat is in the foreground) we filled and leveled the gravel trench.
As with most filling operations, this one had to be done about eight inches at a time with regular packing. My father will freely tell you that shovelling 1.5" gravel is no fun. In the above picture you can also see the waste plumbing pipe coming through the trench. It is now under about 1' of gravel.

After the gravel, we dug the interior footer trench (below, top) and started in on the forms (below, both) for the grade beam. I see cement trucks in our future.

Friday, April 13, 2007

Friday the 13th, Waiting for the Inspector

I'm back.

After over two months without working on the project because of equipment and weather difficulties, I'm back at it . Those two months were not totally spent baking bread and reading the New Yorker. Amanda and I took a nice week-long vacation to California. When we got home, 260 native trees and bushes arrived in the mail from a State of New Mexico sponsored reforestation program. It took me the better part of a week, but I planted all the seedlings around our property and encased them in protective plastic tubes. The tubes are not much to look at, and Amanda has taking to calling our house "Blue Tube Farms," but almost all of the plants have leafed out and are becoming established. The following is a picture of some of the tubes.
After planting the trees, I put in the garden (which you can see to the right of the tubes in the above photograph). It turned out our soil was devoid of the three major nutrients, so I had to bring in 8 cubic yards of compost and numerous boxes of blood and bone meal to get everything up to snuff. After rototilling in the amendments, I piled the soil from the path onto the beds and then filled the paths in with chipped wood. A few cold frames and a fence surrounding the whole 65ft x 45 ft space, and I was ready to plant.


This photo is about 10 days old, we have some little plants popping up now.

Back to the shop...

My father, Jim, is staying with us for a month or so and he has been helping me catch up on the building. So far we have finished digging the foundation and drainage trenches as witnessed in the following poorly composed panorama (the building will be rectangular, I swear).
This foundation system is known as a rubble trench foundation and was popularized by Frank Lloyd Wright in most of his homes and was also used extensively in ancient times (think Roman and Egyptian). After we finished the trench , we lined it with a filter fabric and installed a 4 inch drain pipe. The pipe (and trench) slopes from the upper right to the lower left where it will conduct the water away from the foundation trench and into another deeper trench filled with gravel. You can barely see the drainage trench in the lower left corner of the following photograph.
That brings us to sitting around on Friday the 13th, waiting for the building inspector to come and inspect the trench and pipe so we can fill the trench with rubble (rocks of various sizes--no marble statues to be broken up and used for fill. Alas) and move on to pouring the grade beam.

Stay tuned.

Monday, January 22, 2007

Winter

It seems I've been away for a while. Many people visited over the holiday season (or were visited by us), and the winter snows have been regular enough to keep me away from the building site. I have pressed about 1/3 of the total estimated 10,000 blocks needed for the shop project. These are sitting comfortably under a huge double layer tarp awaiting their turn to be stacked in the walls.

My good friend., Peter, gave me a hand pressing blocks while he was visiting around the shortest day of the year. In return for the physical help, I began to teach him how to drive a tractor (a must for everyone with a doctorate in chemical engineering).

Here is a picture of Peter at the wheelHe is rototilling the soil that I dug out of the foundation trench.

Peter also helped me make a small modification to the block press. We were having problems with the soil hanging up in the hopper (the big white cone on the top of the machine). To resolve this problem, I purchased a 12 volt industrial vibrator from Vibco (you can image the problems with searching for industrial vibrators on Google). The little orange machine, shown in the following picture right above the wheel on the frame of the press, shakes the hopper about 3000 times each minute, causing the soil to smoothly drop into the press. The result is less time spent poking at the dirt in the hopper with a long stick and more consistently sized blocks.

Friday, December 08, 2006

It's December

I'm back to work after the Thanksgiving holiday. The following week we had a decent amount of snow which kept me from digging.


Once the snow melted and the ground dried a bit, I dug some more on the foundation trench, completing the north, west, and south sides. Before digging the north foundation trench, I decided to make blocks out of all the dry soil produced by the north, west, and south trenches. So for the past few days I've been making block. In the following photo you can see the truckload of pallets I scavenged for stockpiling the blocks and the tractor with the block machine.
Under the blue tarp to the right of the block machine is the stockpile of blocks. I think I have around 600 now.

Thursday, November 16, 2006

Finally the Footings

Thanksgiving is almost here and I am finally digging the trench for the foundation. Yesterday I dug the north end of the shop and got the hang of the backhoe controls. Here is a picture of the almost finished product.

Using a backhoe is a lot like playing a very slow and boring video game. I have many more feet to go, so I'm sure I'll make the high score.

There will most likely be no post next week.

Happy Thanksgiving!